- Assembly guide for UK customers
- Assembly guide for other customers
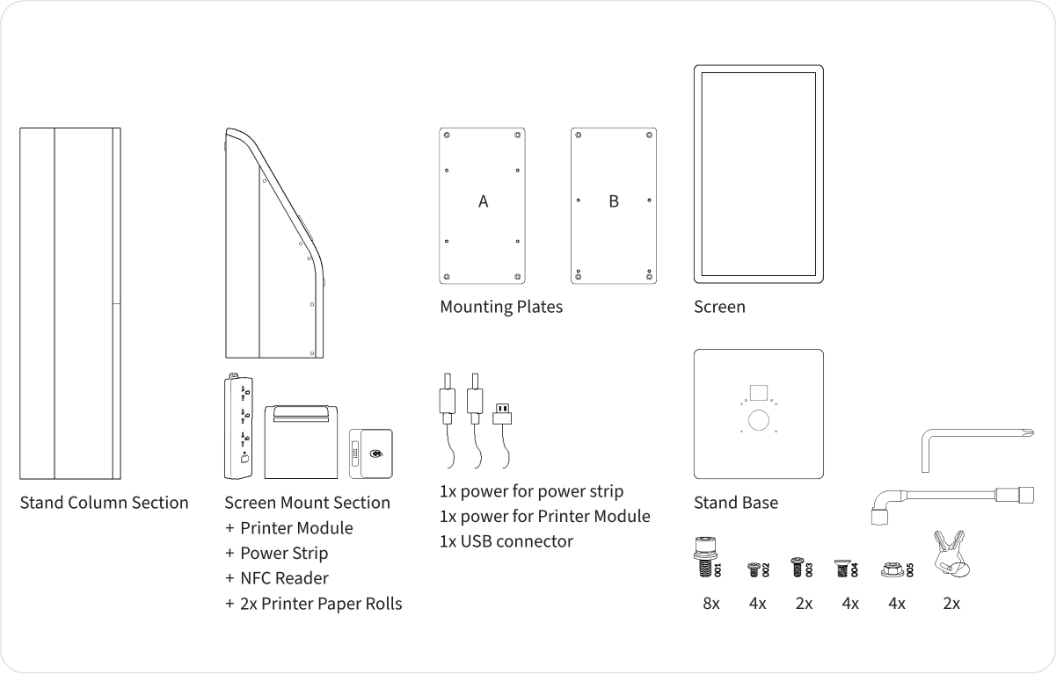
What’s in the box?
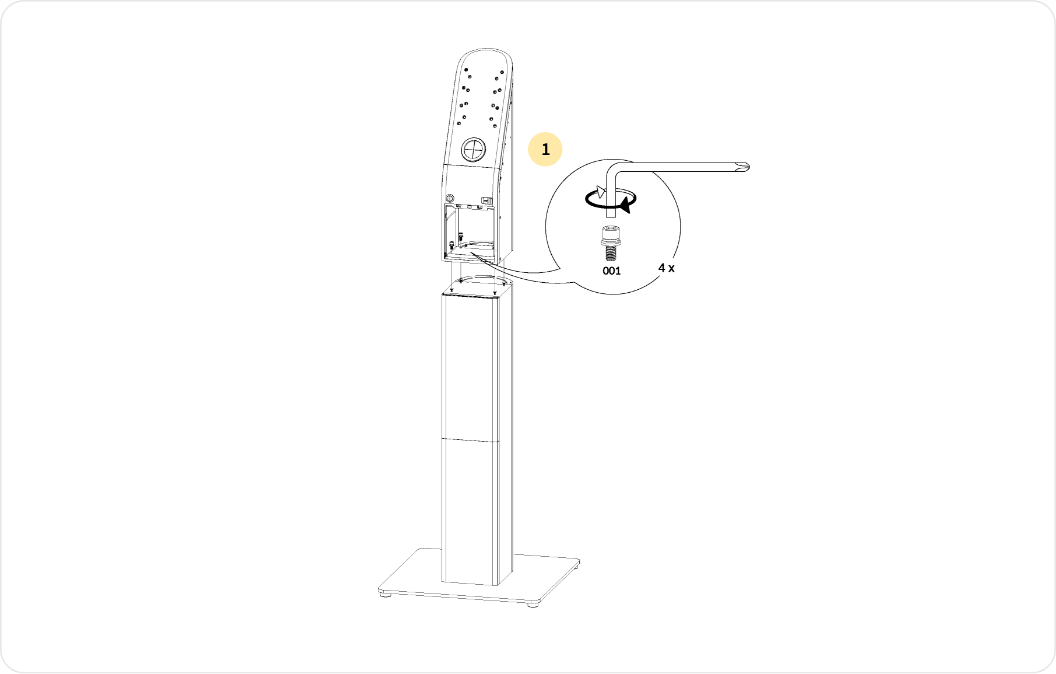
Assembling the base
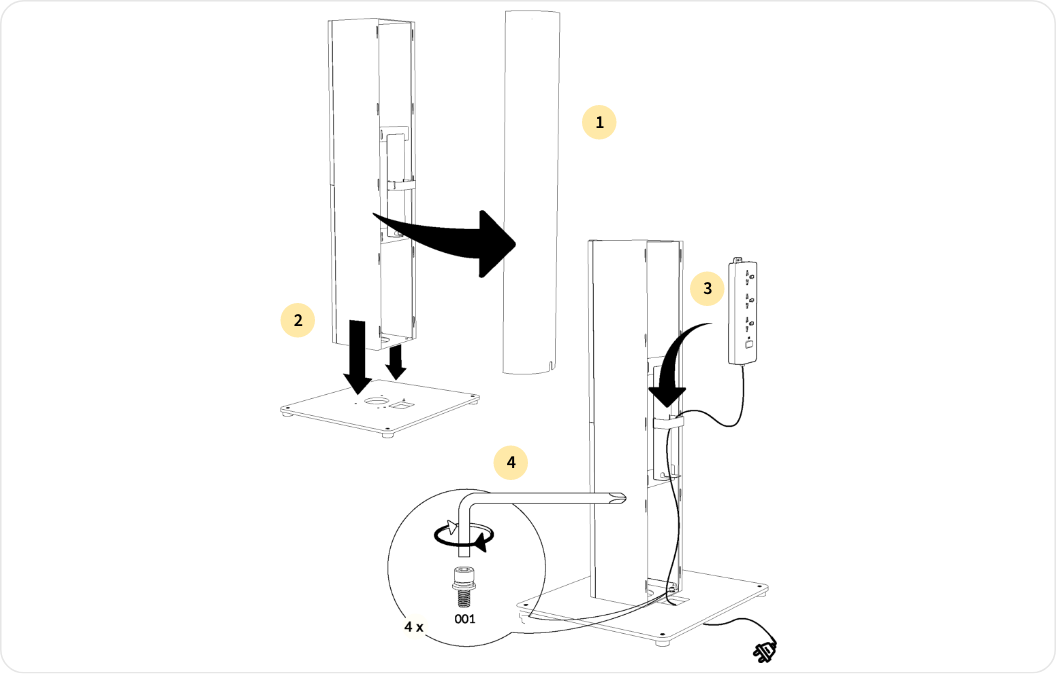
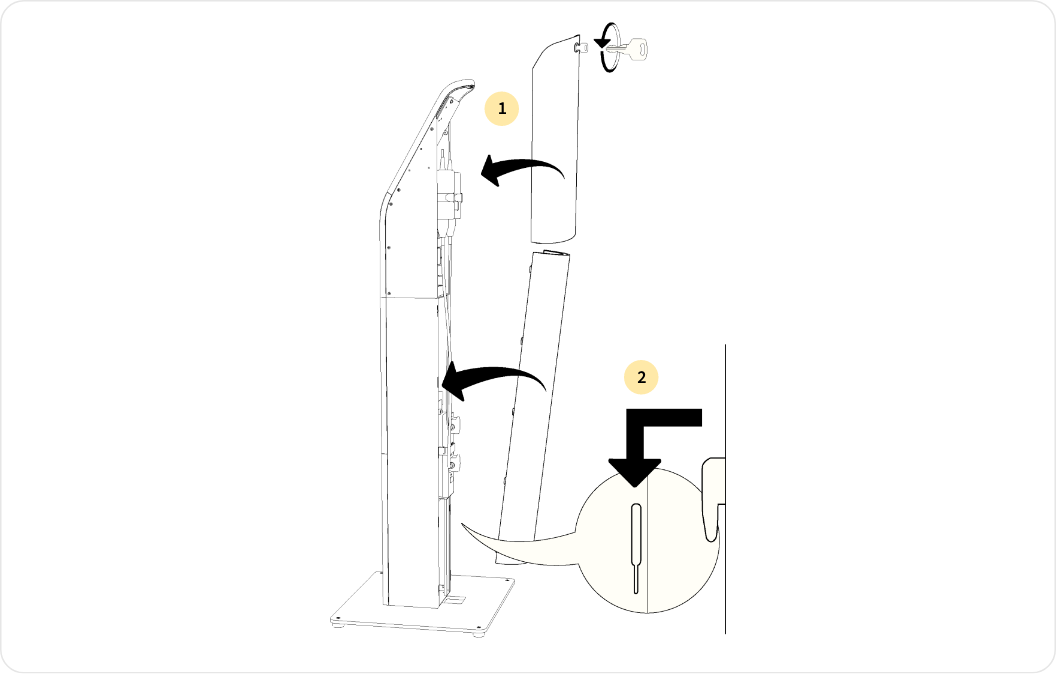
- Remove the backplate from the Stand Column Section
- Place the Stand Column Section onto the Stand Base (make sure the stand is right way round, with the narrower part of the slots towards to the bottom)
- Using the tools & 4x bolts (001) provided, tighten the Stand Column Section to the Stand Base
- Pass the Power Strip cable, starting from the top, down to the base of the Stand, as illustrated
Securing the Screen Mount Section
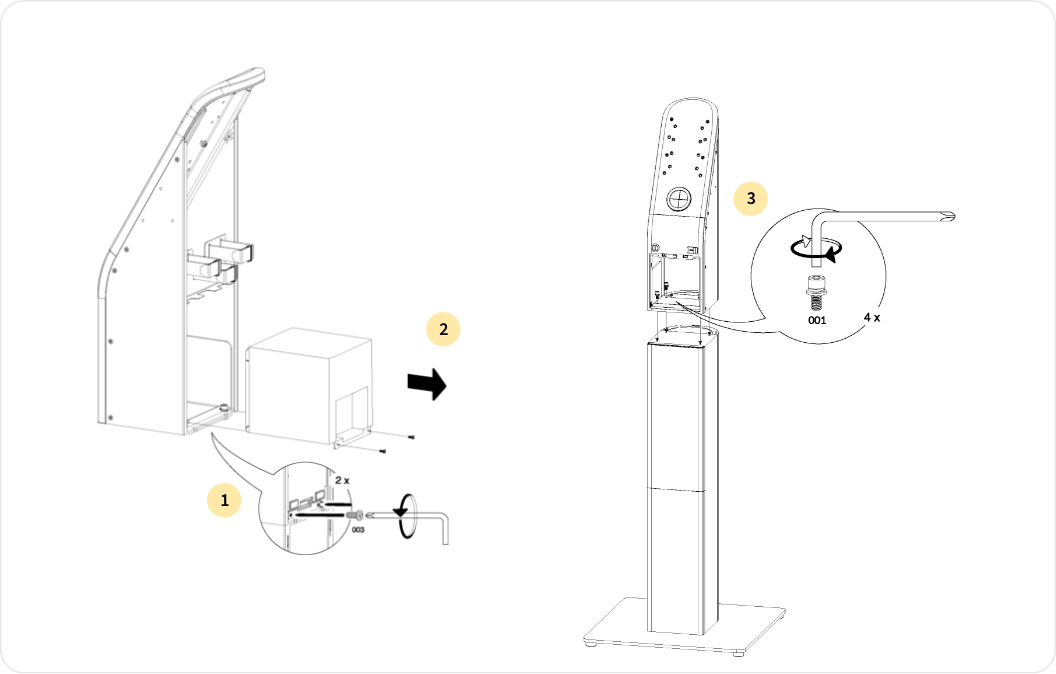
- Using the tools and 4x bolts (001) provided, secure the Screen Mount Section to the Stand Column Section
Securing the Printer Module
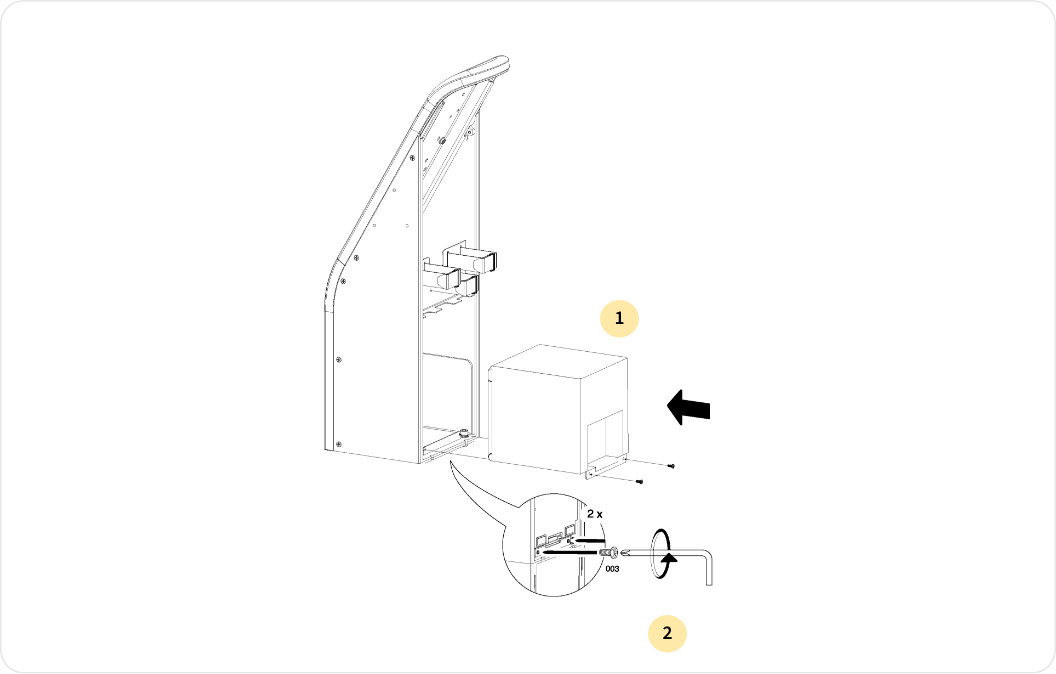
- Remove the Printer Module from its packaging and slide it into the back of the Screen Mount Section
- Use the screws provided to secure the Printer Module
Managing cable placement
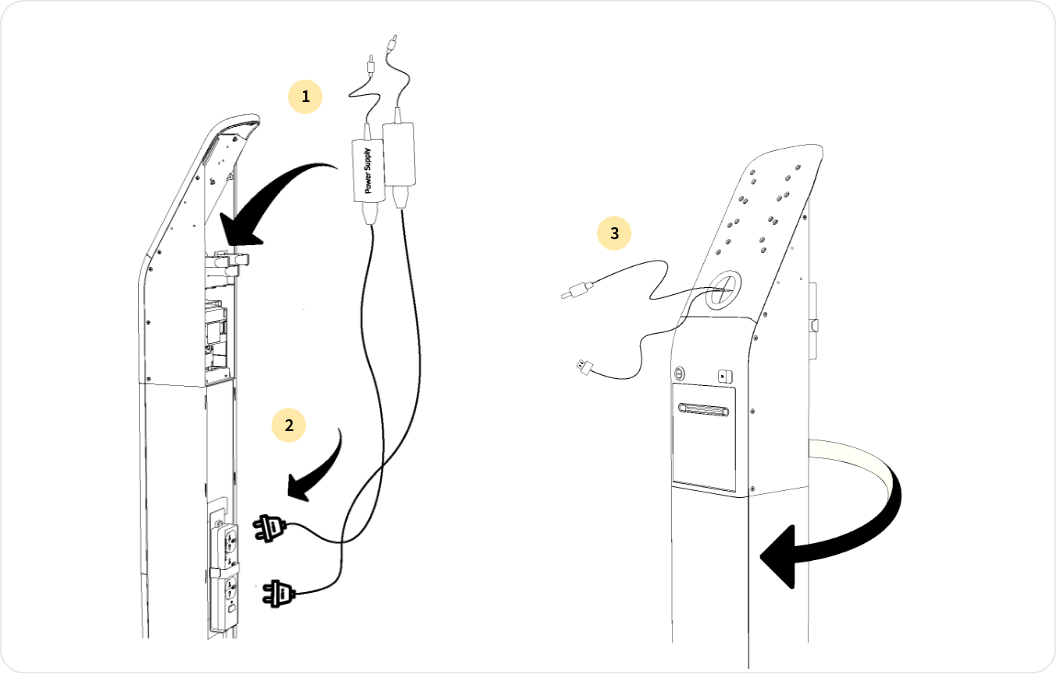
- Place the main power cable and printer cable into the compartment inside the Screen Mount Section
- Route the power plugs downward and connect to the Power Strip
- Feed the ends through the rubber hole for later connection to the screen
Mounting the Screen
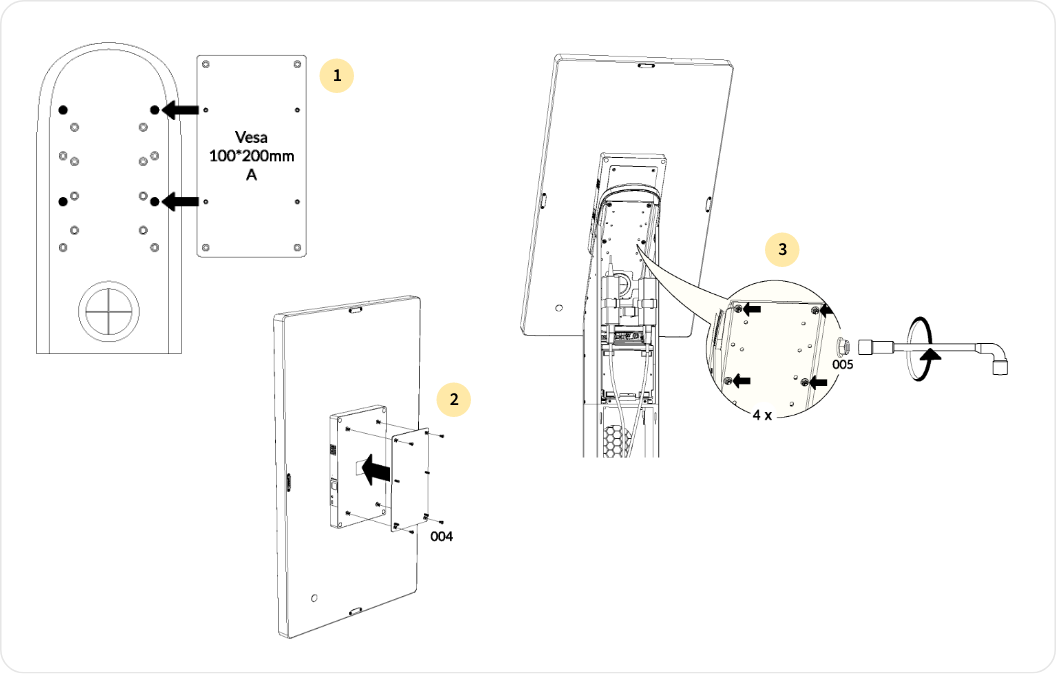
- Find Mounting Plate A
- Secure it to the back of the Screen using the tools & 4x bolts provided (004)
- Position the Screen vertically (in portrait mode) and secure the Screen to the Screen Mount Section using the tools & 4x nuts provided (005)
Reassemble the backplates
- Position the top backplate onto the back of the Screen Mount Section
You may have to unlock the mechanism at the top using the key provided
- Position the bottom backplate onto the back of the Stand Column Section
- Ensure the backplate is locked into place using the 4 click mechanisms
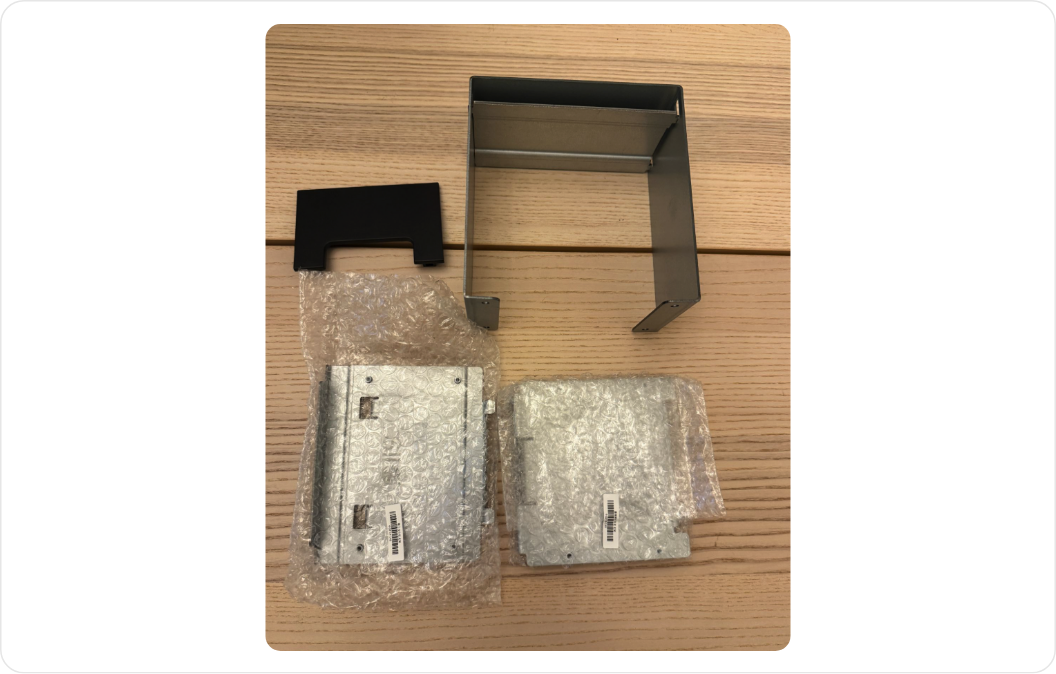
Accessing the Printer Module
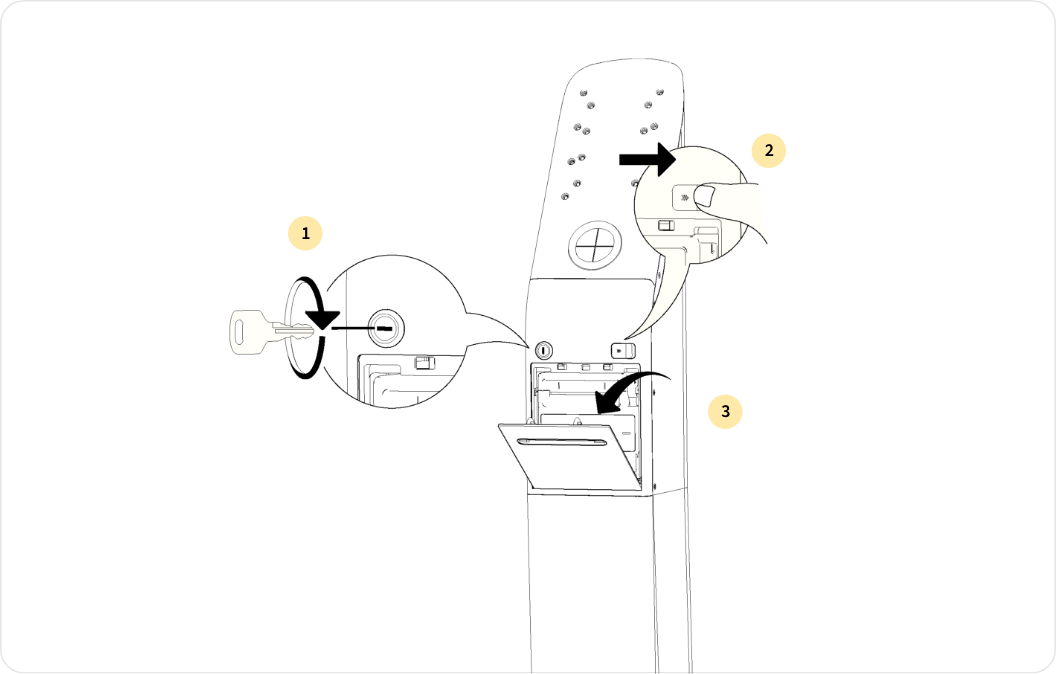
- Use the key provided to unlock the mechanism
- Slide the release button to the right to unlock the Printer module
- The Printer Module cover can now be pulled downwards to access the Printer Module
Install the NFC reader
- Unbox the NFC reader found in the shipment
- On the right-hand side of the KIOSK, locate the NFC connector port — it’s a 12-pin connector
- Align the gold pins on the NFC reader with the connector on the KIOSK. Ensure both sides are flush and the screw holes line up
- Secure the reader using the two provided screws, tightening them carefully to avoid any damage
- Confirm that the NFC reader is firmly attached and the “Tap here to pay” surface faces forward.
Power on the device
You can plug in the ethernet cable at this stage if required.Plug in the power cable to the back of the device and to a mains outlet. Power on the device as described here.
All KIOSKs are supplied with a EU plug by default. Each shipment also includes a universal power distribution unit with the correct regional plug and universal sockets compatible with the KIOSK.